Spaces
Overview
Space is a feature module inside your community. Each space is designed for a specific purpose - collecting feedback, showing your roadmap, announcing changes, or sharing system status.
Each community can have one or multiple spaces
Each space can have multiple posts created from workspace or public site
Organize your spaces into space groups in the left sidebar
Set your spaces’ visibility to Open, Private
There are 4 space templates to choose from, each already configured with settings and customization for the usual cases. You can further customize any template later to match your specific needs.
Feedback: Gather and organize customer suggestions
Roadmap: Share what’s planned, in progress, and completed
Changelog: Announce updates, improvements, and fixes
Status Page: Report incidents and scheduled maintenance
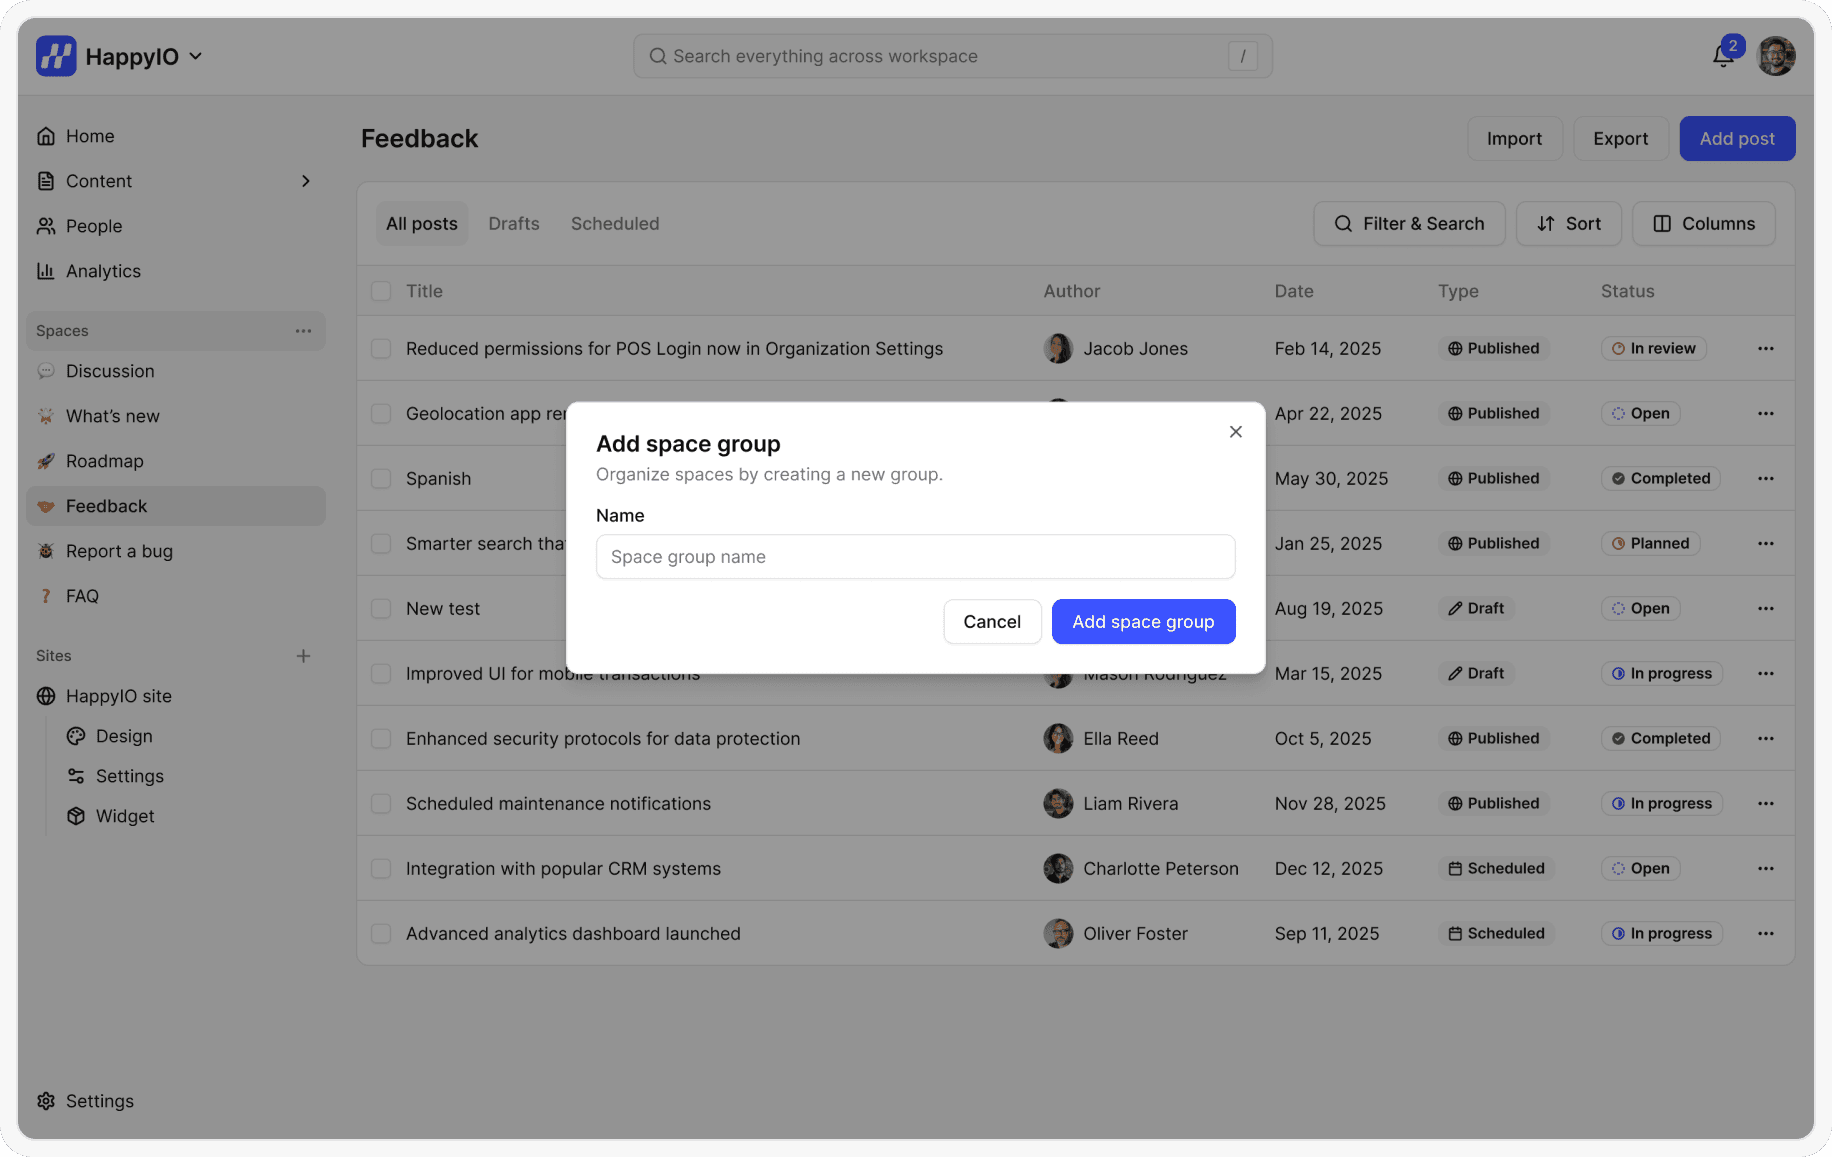
Add a space group
You can organize your spaces by grouping them into space groups. Only Workspace Owner and Admins can add a space group.
Steps
From the left sidebar in your workspace, hover over a space group and click the [...] icon
Click Add space group
Enter a name for your space group
Click Add space group
Done! Your new space group will appear below any existing space groups.
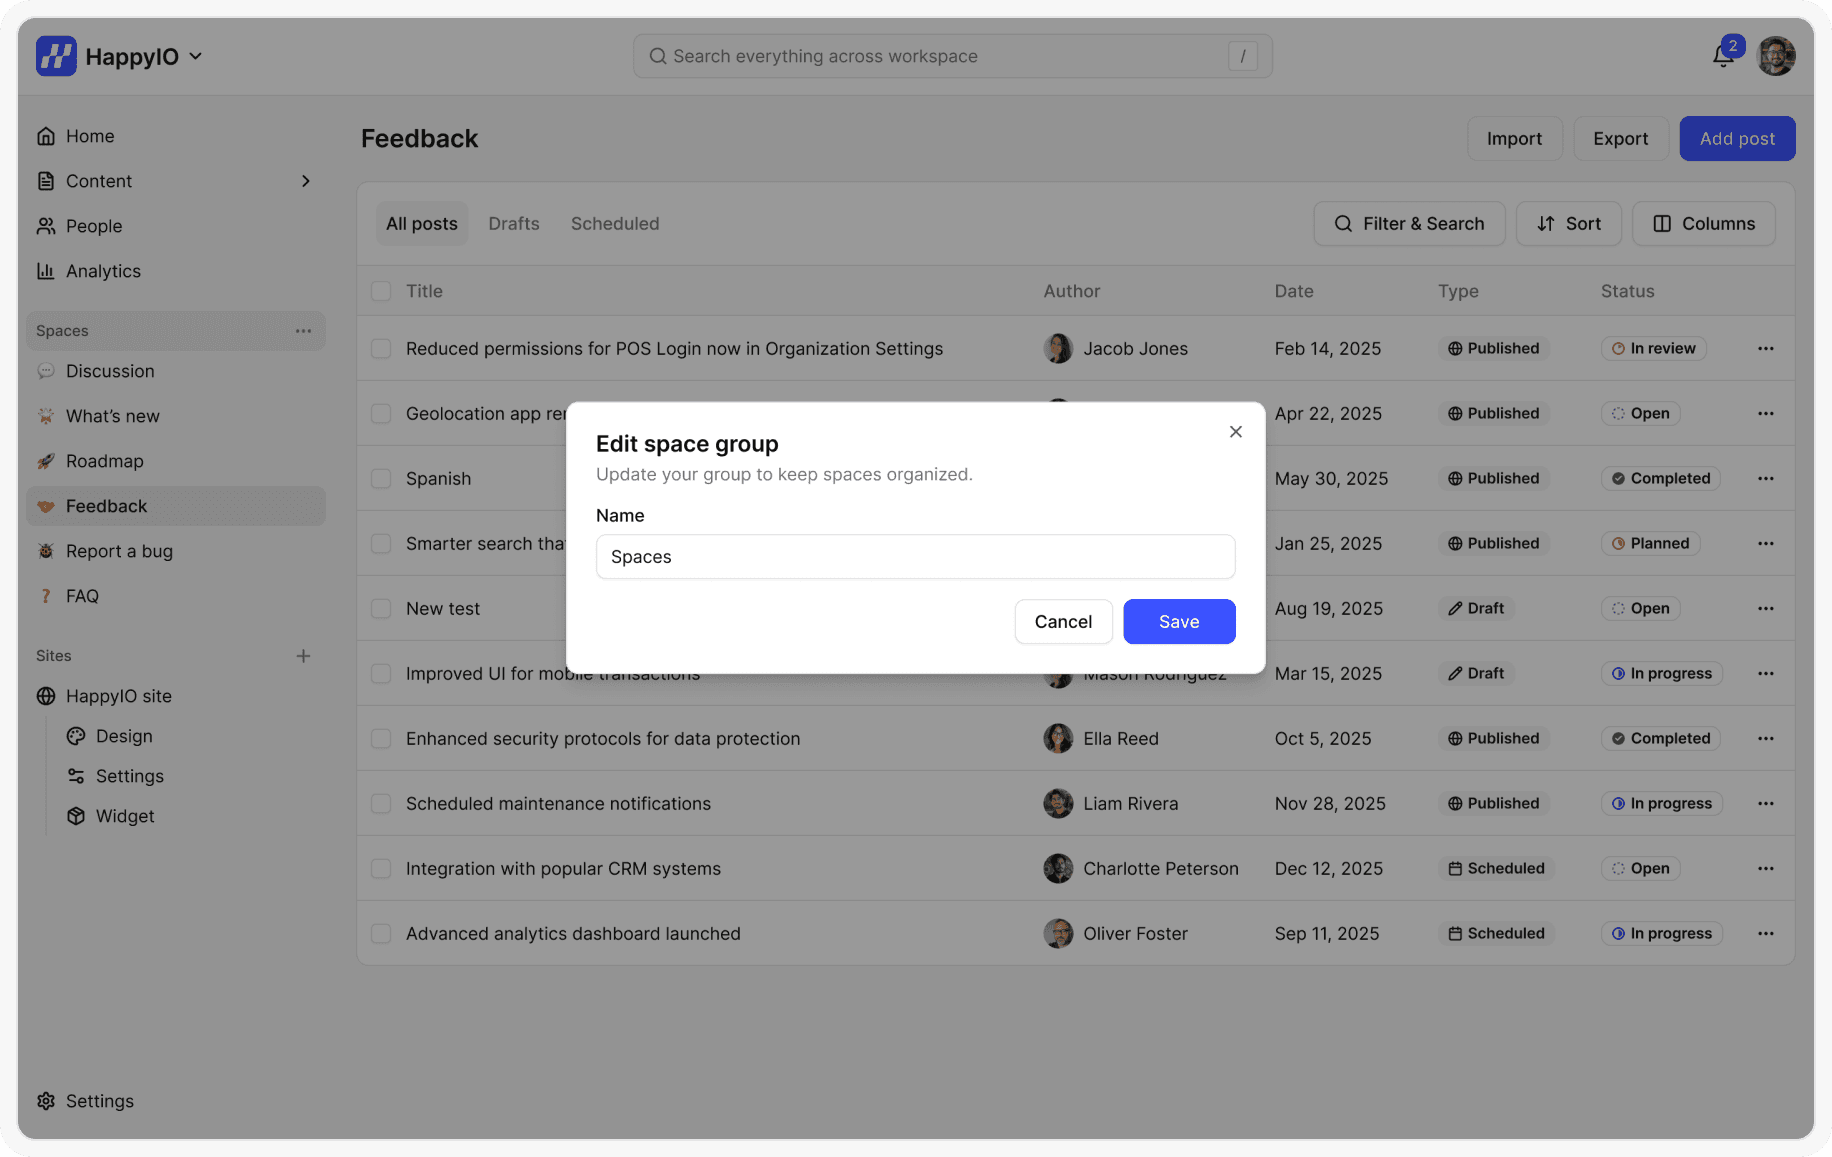
Edit a space group
Only Workspace Owner and Admins can edit a space group.
Steps
From the left sidebar in your workspace, hover over a space group and click the [...] icon
Click Edit space group
Rename the space group
Click Update space group
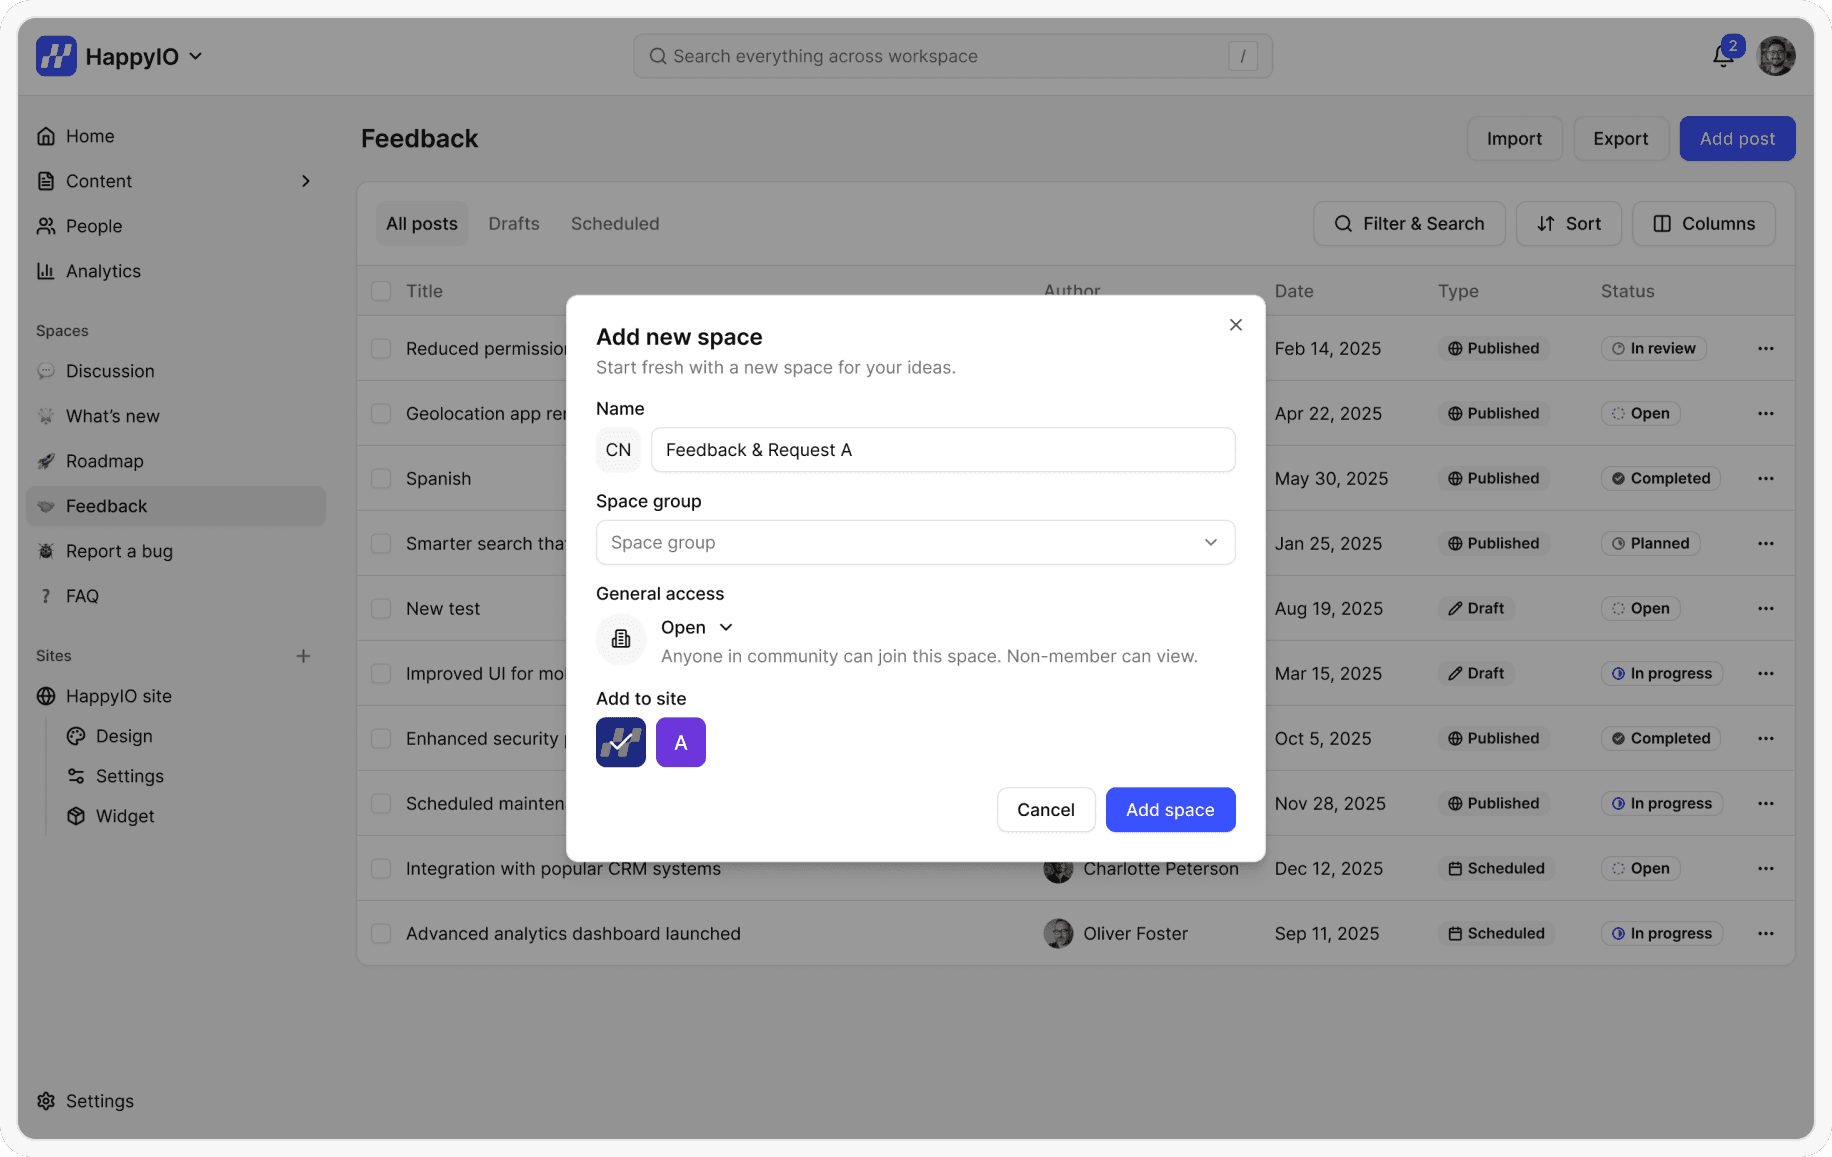
Add a space
Only Workspace Owner and Admins can add a space.
Steps
From the left sidebar in your workspace, hover over a space group and click the [...] icon
Click Add space
Enter a name for your space
Add a space icon
Select a space template
Select a space group (The space group will be pre-filled based on where you initiated the new space. However, you can choose a different space group from the dropdown if you have changed your mind)
Choose from open, private access.
Click Add space
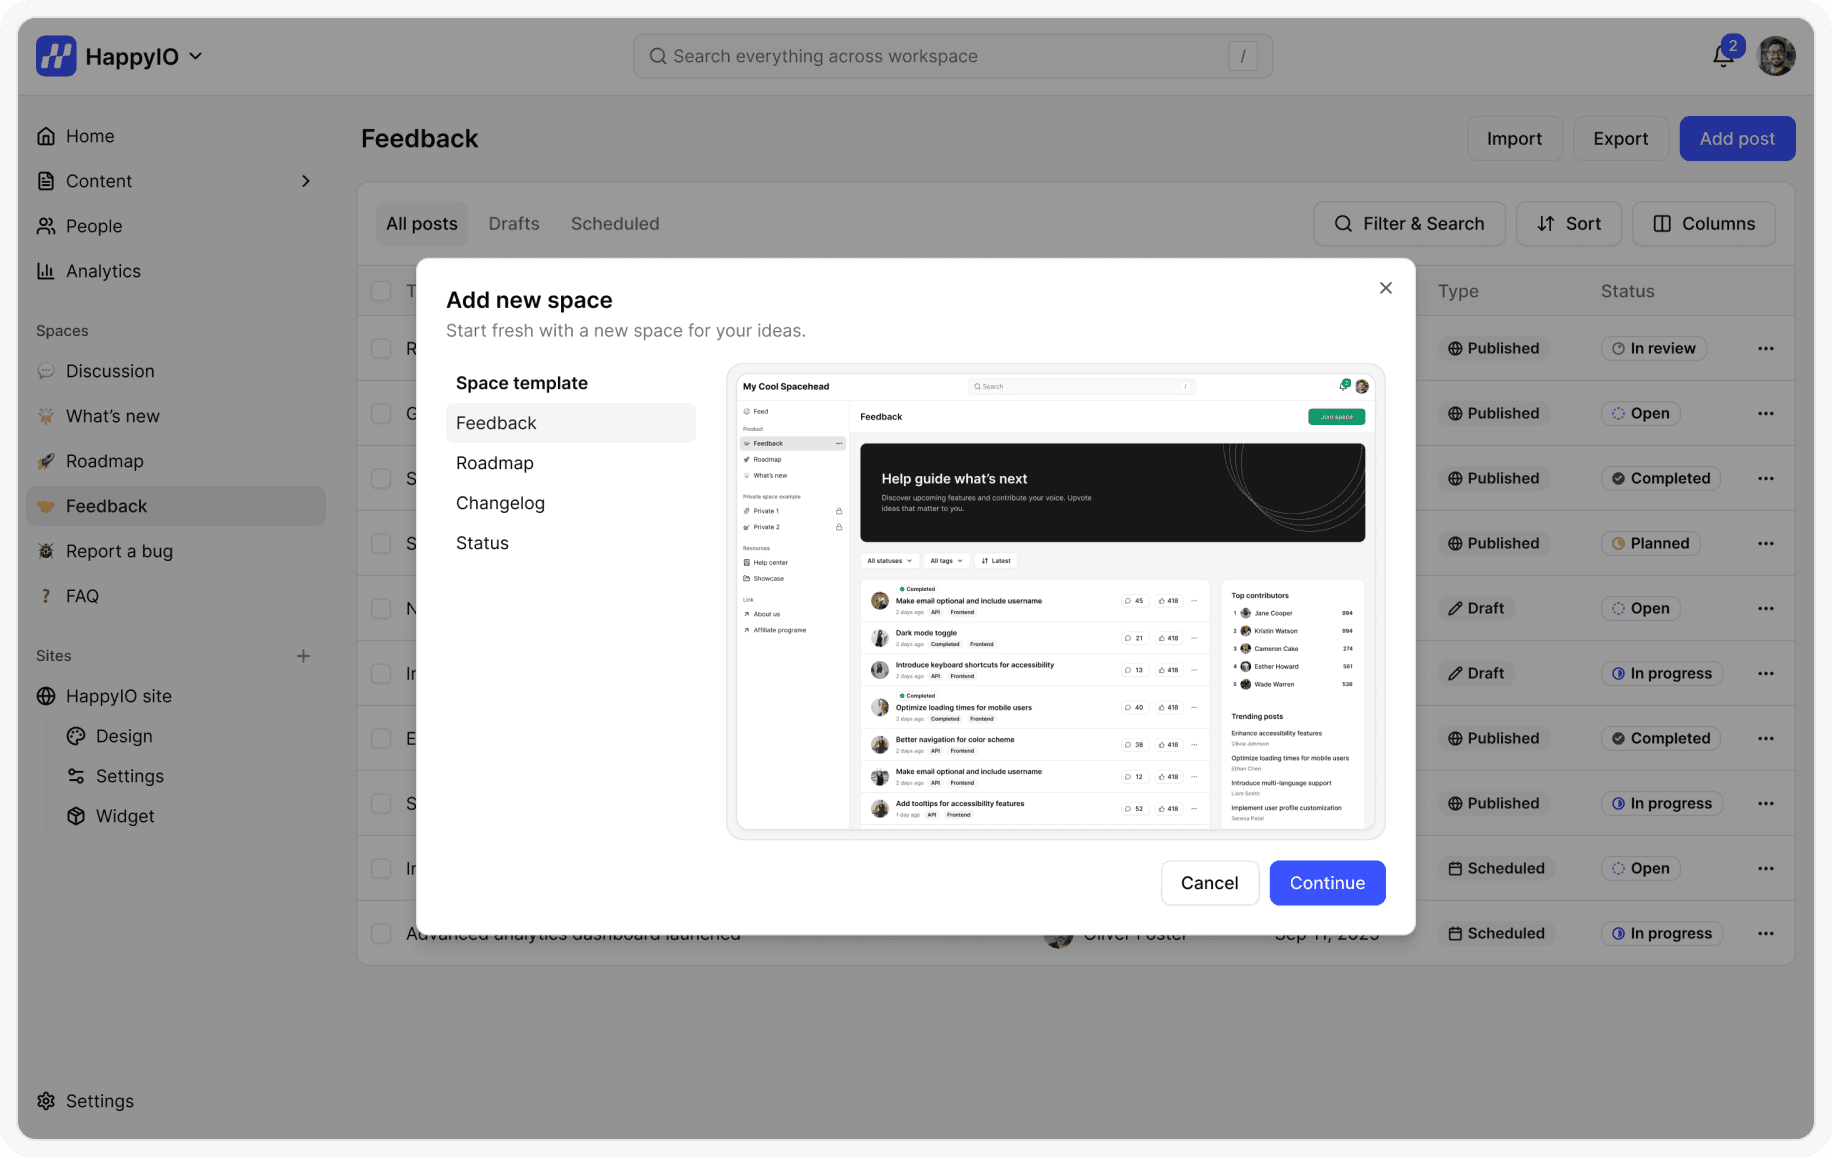
You will now be taken to the newly created space, where you can customize settings and start crafting new posts!
Space access
Every space in your community has access settings that you can configure to control who can access it. These settings allow you to define the default privacy level for each space.
There are 2 space access types:
Open: If you want to provide free and open access to a space, the "Open" setting is the ideal option.
Open space and its contents are visible to members and visitors as well. Everyone can access it either from the sidebar (if visible) or the direct link to the space.
Community members can voluntarily join the space at any time. Even if you manually remove them from the space, they can rejoin on their own.
Private: This allows you to restrict your space from voluntary joins and display a lock screen to all non-space members when they try to access it via the sidebar or URL.
It will display a lock screen to visitors and non-space members when they try to access private spaces within your community.
Community members can only access the space if they are manually added by an admin or moderator.
If a member is removed from a private space, they cannot regain access on their own unless they are added back by the admin or moderator of the space.
Sharing and permissions
Manage members of a space by adding, removing, or giving them moderation privileges using this feature. Read more about Roles and Permissions.
Steps
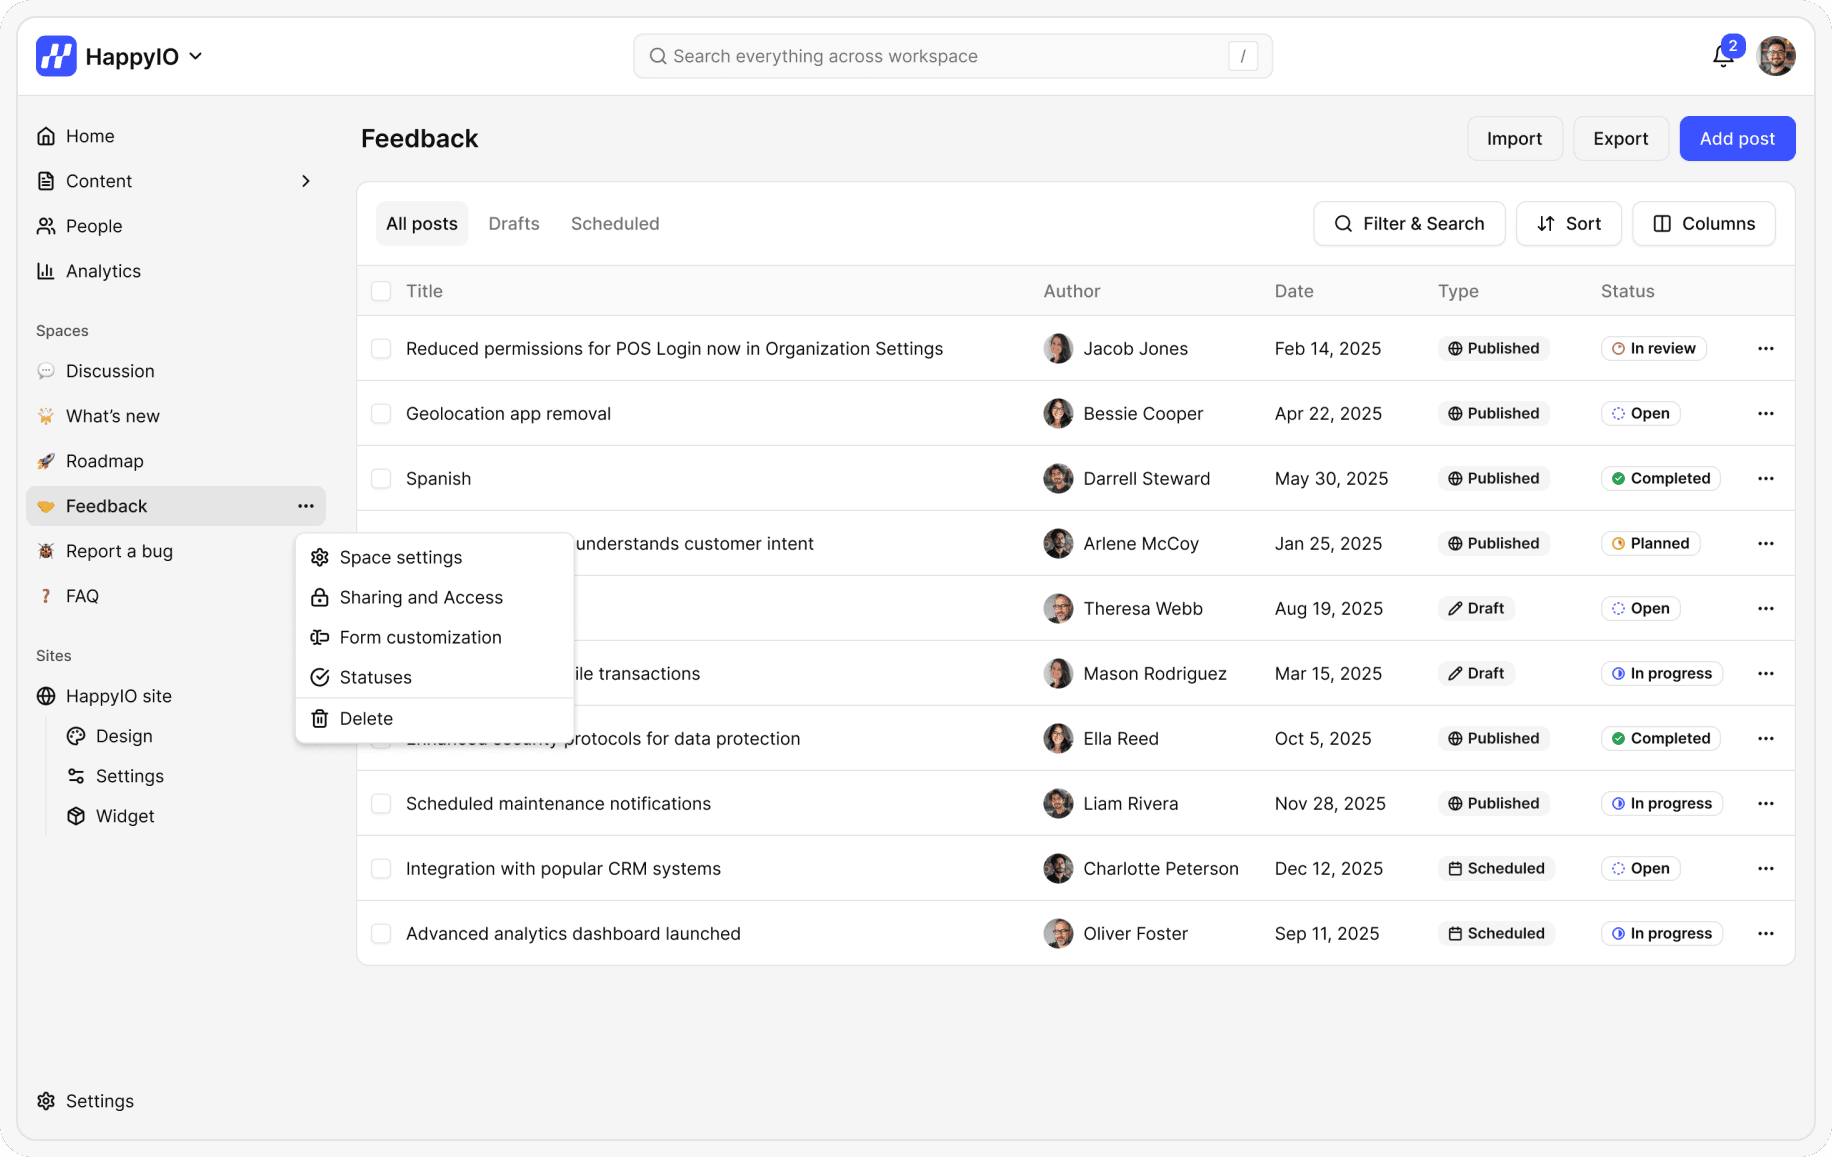
From the left sidebar in your workspace, hover over a space and click the [...] icon
Click Sharing and Access
In the Sharing and Access popup, make any changes:
To invite members to this space, enter a member name or email and select a role
To change the role of a member, click the role beside the member name, and then select another role
To remove a member from the space, click the role beside the member name, and then select Remove
Click Done
Edit space settings
Steps
From the left sidebar in your workspace, hover over a space and click the [...] icon
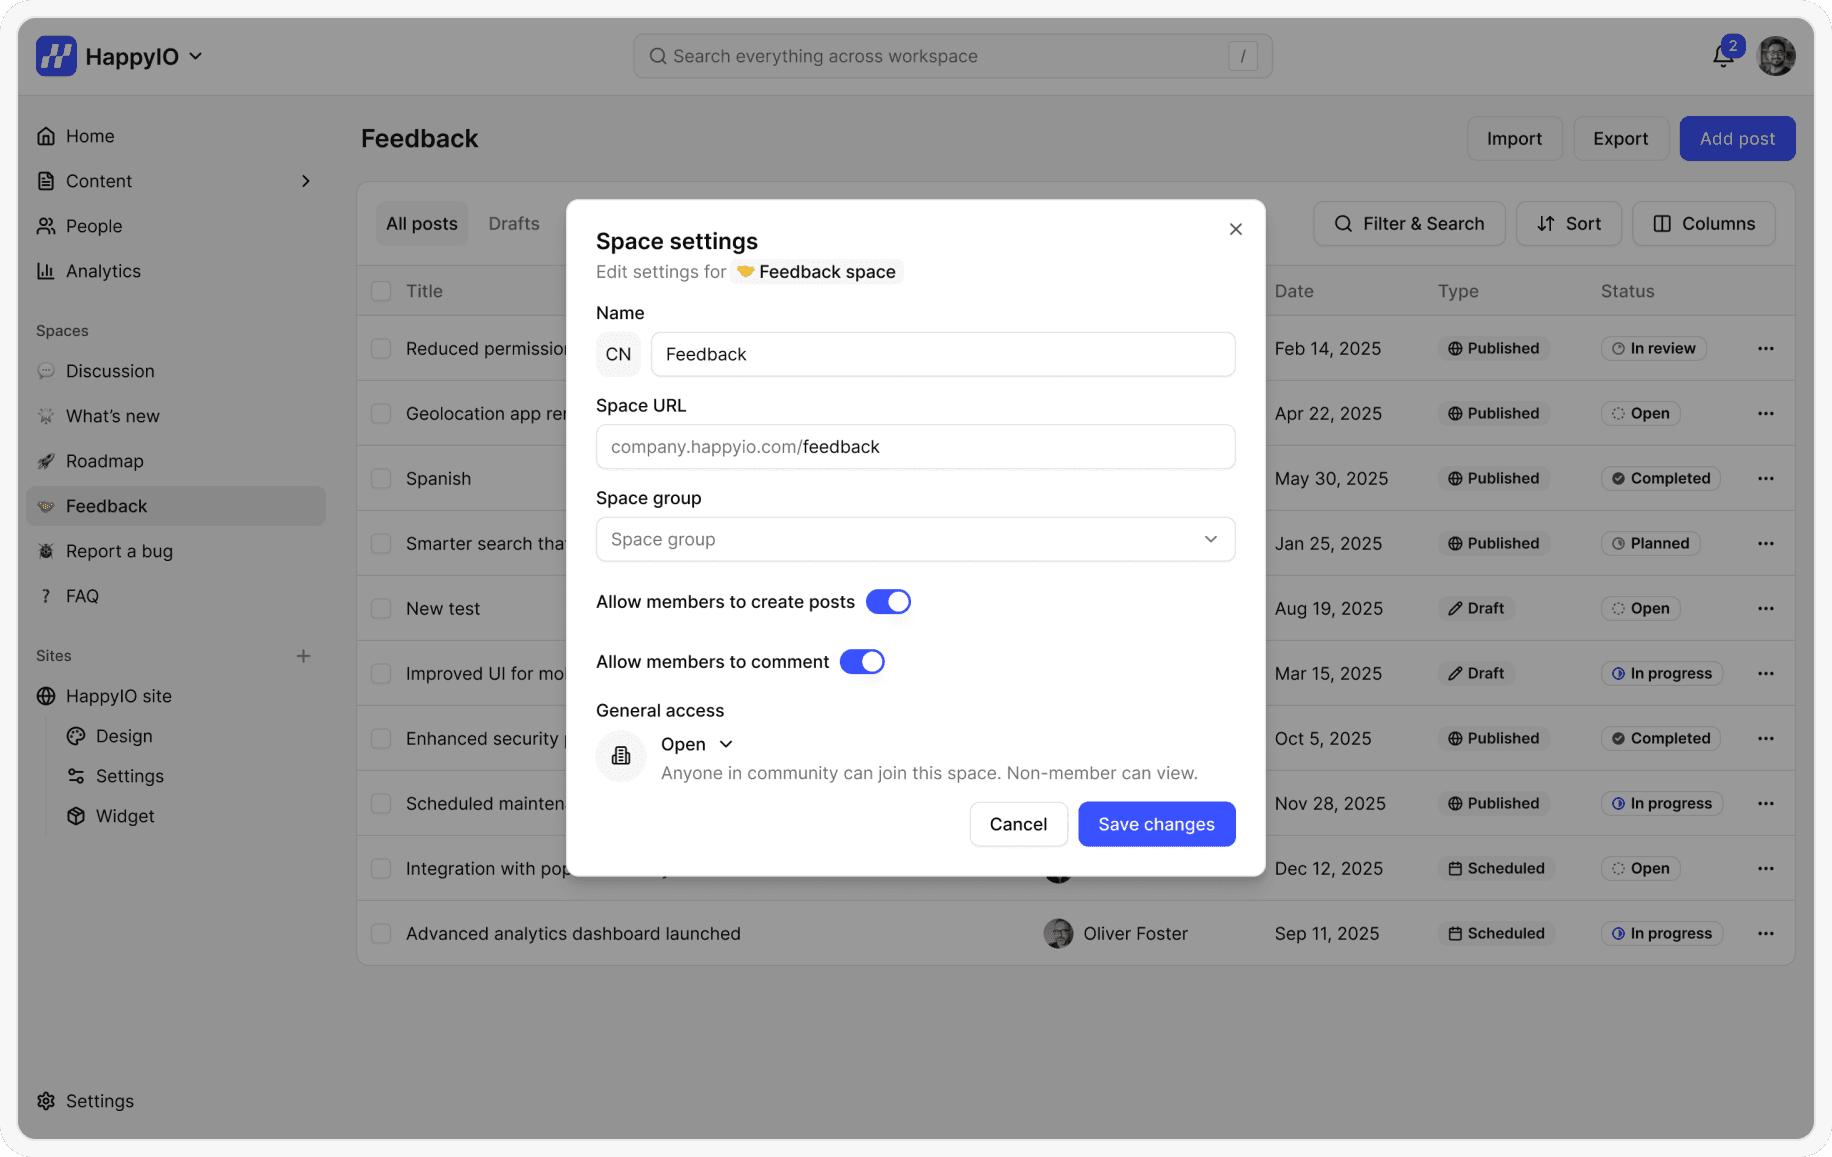
Click Space settings
In the Space settings popup, make any changes:
Space name: Name of your space
Space icon: Add an icon of your choice that will be displayed in the left sidebar of your community
Space URL: Edit your space URL
Space group: you can choose a different space group from the dropdown to move the space to another group
Allow members to create posts: Turn this toggle on to provide your space members with the ability to create posts.
Allow members to comment: Turn this toggle on to provide your space members with the ability to comment on posts.
Space access: Choose from open, private access.
Click Save changes
Customize post form in a space
Each space has its own separate post form, so you can customize the fields and wording of the form to fit the space.
Steps
From the left sidebar in your workspace, hover over a space and click the [...] icon
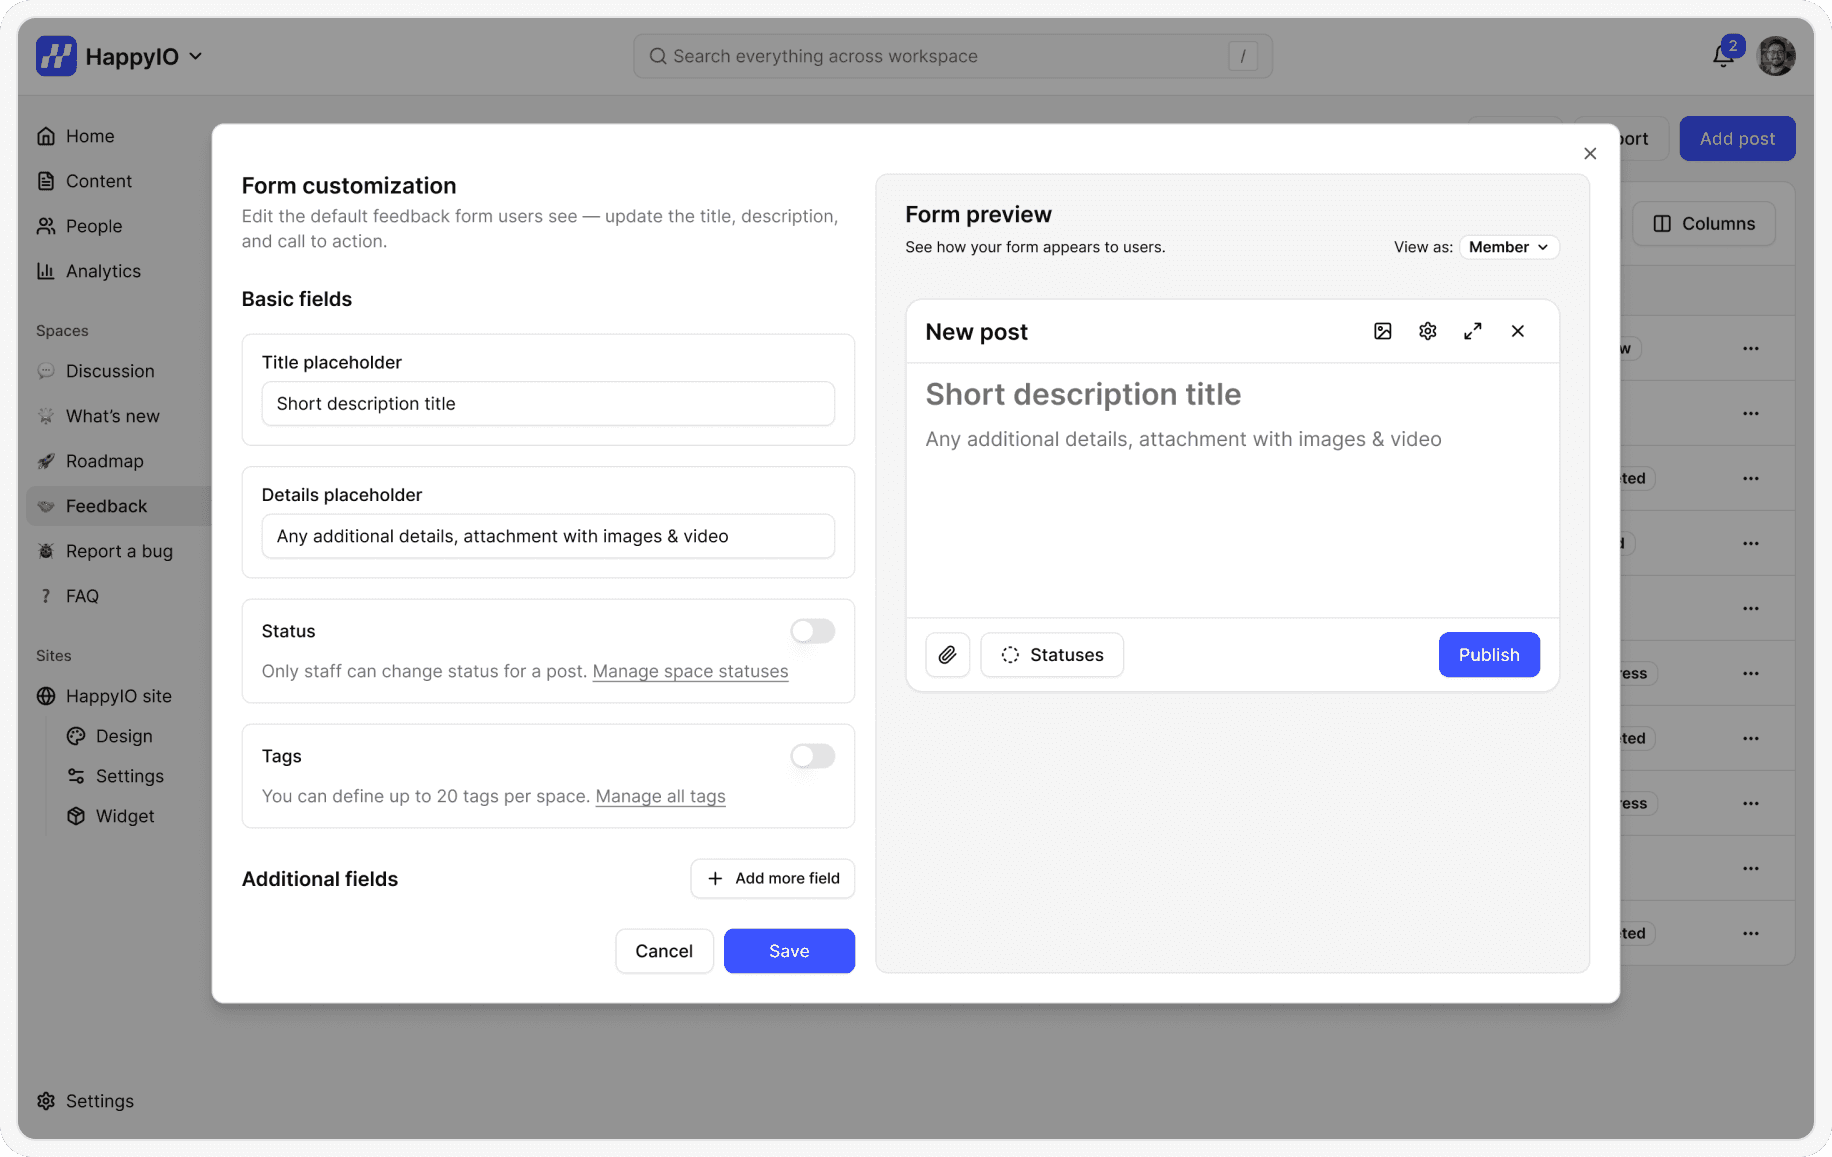
Click Form customization
In the Form customization popup, make any changes:
Title placeholder
Details placeholder
Status: Turn this toggle on to show status for each post in this space. Only staff can select a status for a post. Statues can be updated in Statuses
Tags: Turn this toggle on to show tags for each post in this space. All members can select tags for a post, but only staff can create, edit or delete a tag. Tag can be managed in Tags
Additional fields: Choose from all Taxonomies to add the related Terms to this space. All members can select a Term for a post but only staff can create, edit or delete a term. Taxonomies and Terms can be managed in Taxonomies and Terms
Click Save changes
Customize space on public site
You can customize the appearance of every space on each public site. Follow steps in Customize space section in Customize public site.
Delete a space group
You can delete a space group to permanently remove all spaces and their content within the group. This action is irreversible, and all data associated with the space group will be permanently lost.
Steps
From the left sidebar in your workspace, hover over a space group and click the [...] icon
Click Delete space group
In the confirmation popup, click Confirm
Delete a space
You can delete a space to permanently remove all posts within the space. This action is irreversible, and all data associated with the space will be permanently lost.
Steps
From the left sidebar in your workspace, hover over a space and click the [...] icon
Click Delete space
In the confirmation popup, click Confirm